前言
从很久很久之前,就建起了hexo博客。以前的步骤是在笔记本中新装一个ubuntu系统,然后安装nodejs以及hexo,然后新建博客文章,最后再执行hexo -g && hexo -d,这样一套流程下来才能看到结果。这里有个很蛋疼的问题是,写新博客必须在指定的环境内才能书写。
现在github有了Actions之后,因为Actions可以云执行脚本(具体参考链接action),所以再也不需要在本地部署hexo以及在指定环境书写博客了,因为github有网络就可以上。
迁移前的准备
- 配置部署和开发密钥
- 新建私有仓库用以存放hexo博客源文件
首先在任意一台linux机器上使用ssh-key命令生成密钥对,以备给GitHub Actions使用
1
| ssh-keygen -f github-deploy-key
|
命令执行完成后就在本地生成了两个文件github-deploy-key.pub和github-deploy-key,分别对应的是公钥和私钥。
公钥文件内容配置到xxx.github.io博客仓库中,具体路径是:Settings -> Deploy keys -> Add deploy key.
名字暂定为HEXO_DEPLOY_PUB,等会编译Actions文件时需要使用到。
新建一个私有仓库,名字暂定为blog_file , 然后将私钥文件内容配置到此仓库,具体路径是:Settings -> Secrets -> Add a new secret.
名字暂定为HEXO_DEPLOY_PRI,这也是需要在Actions文件中用到。
处理原有的HEXO本地文件
原来在本地搭建hexo博客时,会在本地生成一个指定的目录保存hexo相关文件,其中包含博客文章markdown文件。这里需要干两件事情:
- 新建Actions执行定义文件
- 将本地hexo文件推送到私有仓库存档
在hexo源文件目录下,新建.github/workflows/hexo_deploy.yml文件,文件内容如下:
 1
 2
 3
 4
 5
 6
 7
 8
 9
10
11
12
13
14
15
16
17
18
19
20
21
22
23
24
25
26
27
28
29
30
31
32
33
34
35
36
37
38
39
40
41
42
43
44
45
46
47
48
49
50
51
52
53
54
55
| # 这里名字就是你在仓库Actions标签中看到的名字,可以自定义
name: CI
# 定义在何时触发执行下面的 jobs
on:
# 在master分支上由新的推送即触发此workflows
push:
branches: [ master ]
# 环境变量
env:
GIT_USER: example
GIT_EMAIL: example@example.com
# A workflow run is made up of one or more jobs that can run sequentially or in parallel
jobs:
# This workflow contains a single job called "build"
build:
name: Build on node ${{ matrix.node_version }} and ${{ matrix.os }}
# The type of runner that the job will run on
runs-on: ubuntu-latest
strategy:
matrix:
os: [ubuntu-latest]
node_version: [13.x]
# Steps represent a sequence of tasks that will be executed as part of the job
steps:
# 每一步都由一个name字段和uses或者run字段组成,name 字段即是在Actions页面看到的步骤名字,
# uses字段表明复用别人已经写好的相关workflows,run表示执行多条bash指令
# Checks-out your repository under $GITHUB_WORKSPACE, so your job can access it
- name: Checkout
uses: actions/checkout@v2
- name: setup node.js ${{ matrix.node_version }}
uses: actions/setup-node@v1
with:
node-version: ${{ matrix.node_version }}
- name: Configuration environment
env:
HEXO_DEPLOY_PRI: ${{secrets.HEXO_DEPLOY_PRI}}
run: |
sudo timedatectl set-timezone "Asia/Shanghai"
mkdir -p ~/.ssh
echo "${HEXO_DEPLOY_PRI}" > ~/.ssh/id_rsa
chmod 600 ~/.ssh/id_rsa
ssh-keyscan github.com >> ~/.ssh/known_hosts
git config --global user.name $GIT_USER
git config --global user.email $GIT_EMAIL
- name: Install dependencies
run: |
npm install
- name: Deploy hexo
run: |
npm run deploy -- --generate
|
然后hexo源码目录中执行下列命令:
1
2
3
4
5
6
| git init
git add *
git add .github # git add * 不会把.github目录下的文件加进来,所以此处手动添加
git commit -m "init commit"
git remote add origin https:github.com/xxxx/blog_file.git
git push origin master # 推送本地文件到github仓库
|
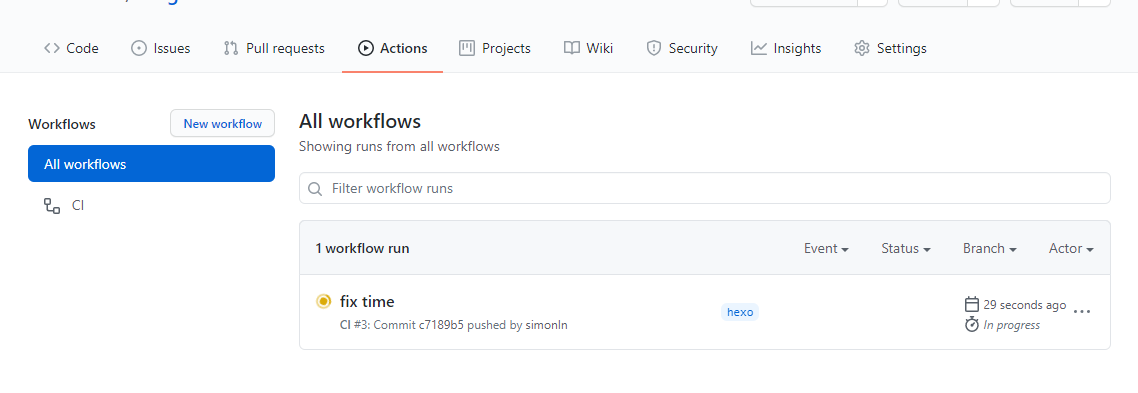
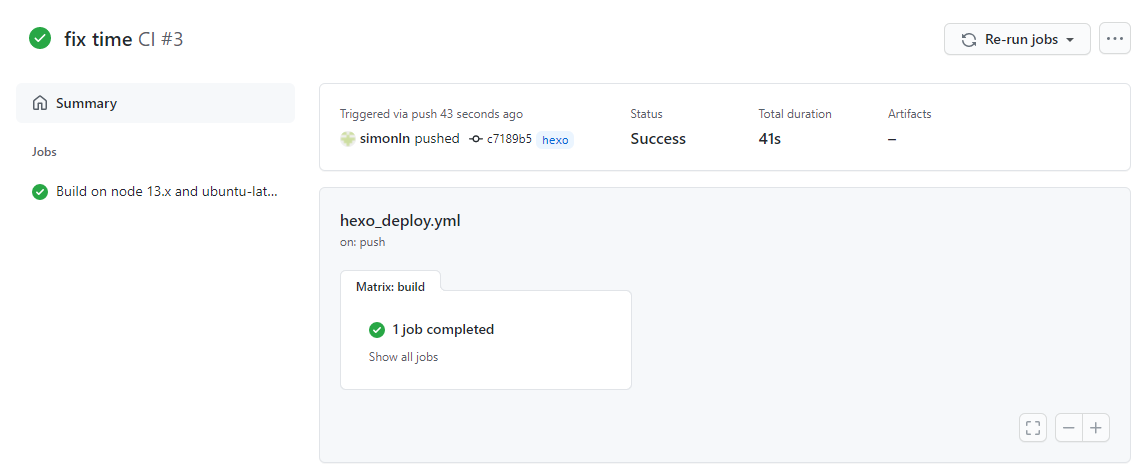
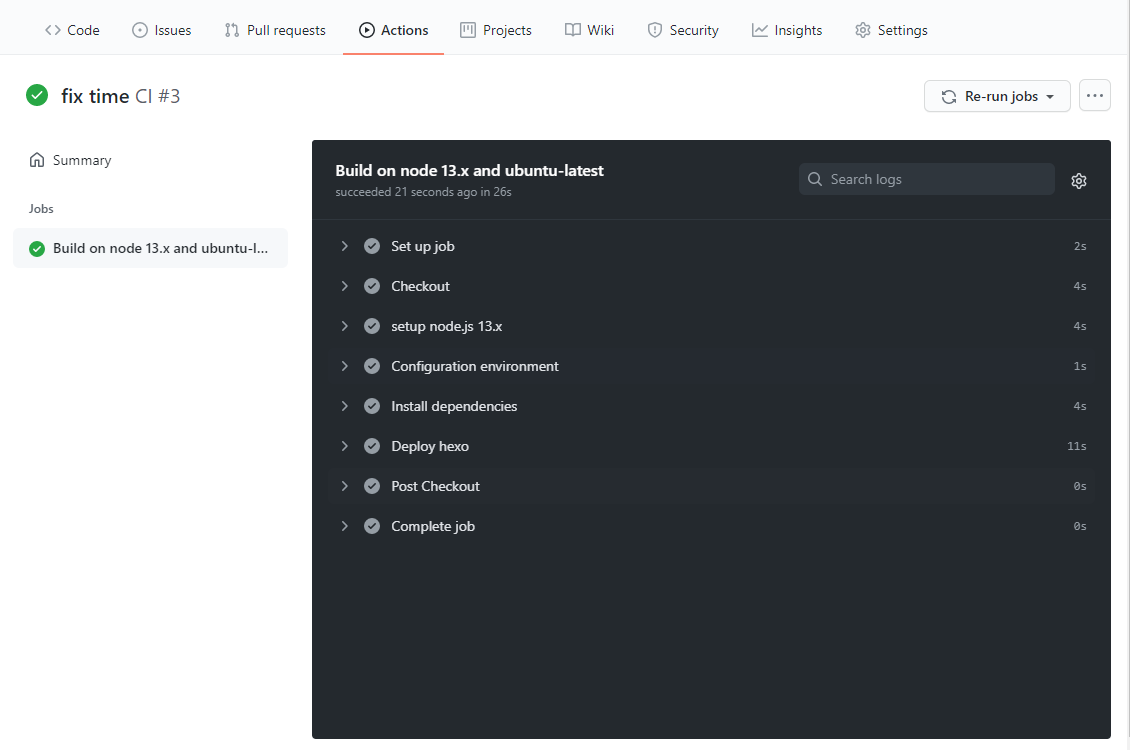
当把本地仓库推送到远端仓库后就可以在blog_file仓库的Actions页面中看到已经触发workflows开始执行了,稍微等一会就能看到执行结果。
执行页面:

执行结果:

每一步执行结果:

此时刷新一下博客页面,即可看到效果。


